
How to Sew a Face Mask — Summarized From NY Time Article
You will need:
Tools
-
Needle and thread (and a sewing machine, if you have one)
-
Scissors
-
Pins or clips to hold fabrics in place (safety pins and paper clips will also work in a pinch)
Materials
-
At least 20 by 20 inches of 100 percent cotton fabric, such as a flat tea towel
-
4 strips of cotton fabric for ties, about 18” long and ⅛” wide
OR
-
Two flat (1/4”) sewing elastics that are 7” long each
Step 1 — Prepare your materials

Choose your piece of cotton fabric, prewash it on the warmest setting and dry it on high heat. (Tea towels are better to use than T-shirts or linens.
Fold the fabric in half. Measure and cut out a 9.5” by 6.5” rectangle to create two identically sized layers. This is your mask base.
Now it’s on to the fabric ties.
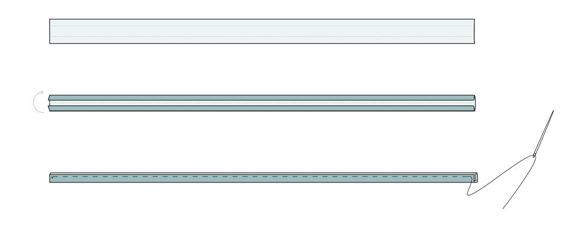
Cut 4 thin pieces of material, about 18” long and ¾” wide. Fold each piece of fabric twice lengthwise, then once more to tuck the rough edges inside. Sew a straight line along the middle. This will prevent the fabric ties from having frayed edges.
Step 2 — Adding the ties
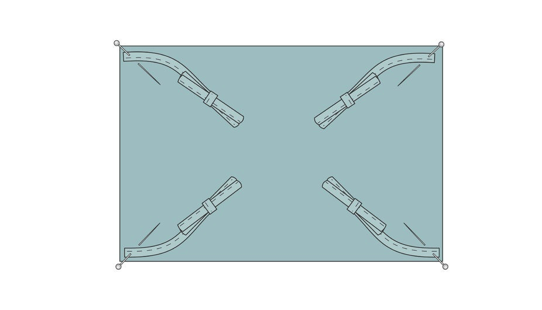
Take one of your rectangular fabric layers. With the “right side” (or the outer-facing side, where the pattern might be) facing you, pin down the 4 fabric ties, one piece per corner. Make sure that the ties are gathered in the center of the fabric layer before advancing to the next step.
Step 3 — Putting it together
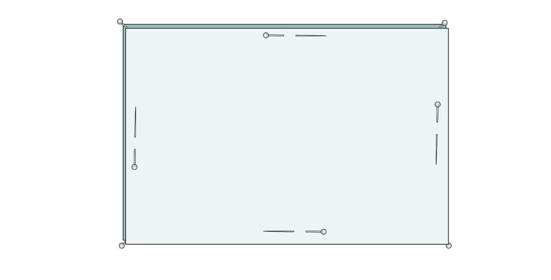
Take the second layer of fabric and line it up with the first. The “right sides” (or patterned sides) of the fabric should be facing each other, sandwiching the fabric ties or elastics. Secure the fabric sandwich together with pins.
Step 4 — Start stitching
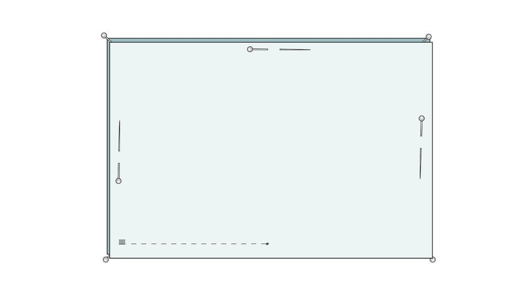
Eyeball a midway point. From the middle, sew a straight line across the mask, about ¼” above the bottom edge of the fabric, toward the bottom left-hand corner. Remove any pins as you sew past them.
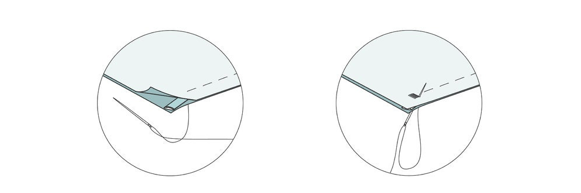
Make sure that the elastic or fabric ties are secured in the corners, sandwiched by your two layers of fabric, as you sew over their ends. You want to make sure your needle goes through the three pieces: the top layer, the end of the fabric tie, and the bottom layer. Add a couple stitches forward and backward (in both directions) to secure your ties in place.
Step 5 — Stitch all around
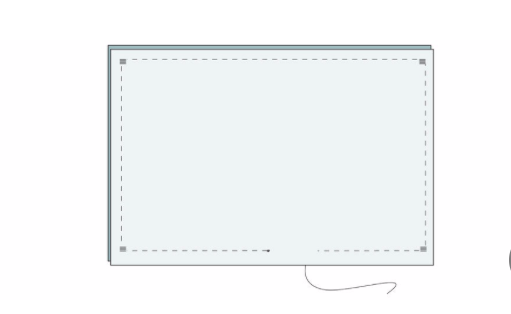
Stitch all around the perimeter of the fabric layers, repeating the forward and backward motion at each corner to secure all the elastic ends or fabric ties.
Continue to stitch your way toward the starting point, but stop to allow for a 1 ½” gap.
Step 6 — Turn out
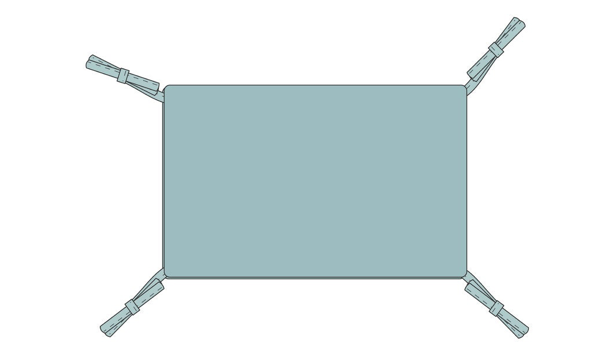
Turn your project right-side out from the little 1 ½” gap. Your fabric ties or elastics should now stick out, like little legs.
Step 7 — Pleats please
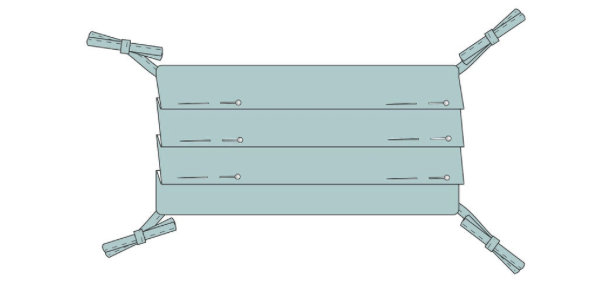
Make three staggered pleats lengthwise on the mask, as if folding a paper fan. This helps the mask conform to the wearer’s face. Secure each pleat with pins.
Step 8 — Finishing up
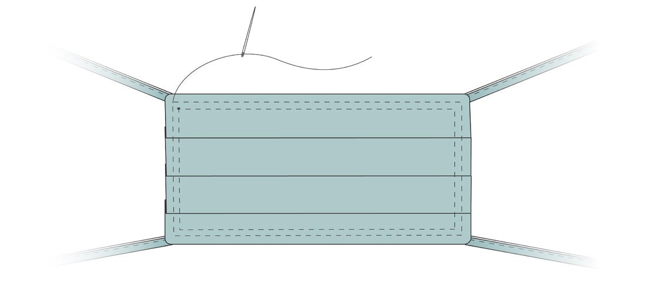
With your pleats held in place by pins, stitch around the perimeter of the mask, ¼” away from the edge of the seam. This is called a top stitch. Take care when stitching over the pleats as the fabric may be quite thick.
Top stitch a second time around, about ¼” in from the first round of stitching. Now you have a completed mask.
Leave a Reply